Projections issues
Some users have reported discrepancies with the location of their data over the basemap imagery in iGIS and/or a desktop GIS tool (such as ArcMap). If you are noticing a shift in your layers, this article may help you.
All vector data in iGIS is stored in the common coordinate system: WGS84 EPSG:4326. All raster data in iGIS (pre-processed through MapTiler software) is stored in the common coordinate system: EPSG:900913. Using these coordinate systems for all source data speeds up rendering in iGIS’s map display.
iGIS uses the open source proj4 library ( http://trac.osgeo.org/proj/ ) to support:
- the reprojection of vector data on import/export from its original defined input coordinate system to WGS 84 (EPSG:4326)
- re-projection of displayed iGIS project map centre coordinates from the WGS84 coordinate system into the projection defined for a particular project.
If you are unsure which coordinate system to use when you create a new project, we recommend you use the default EPSG:4326 WGS84 Lat/Lon for vector data. This will ensure your data collection is not affected by reprojection within the application.
If you find that your points don’t line up with your basemap imagery as expected, it is likely that there is a bug with the proj4 library. Bugs in the library can be submitted at the Proj4 website http://trac.osgeo.org/proj/ We incrementally update iGIS’s version of the Proj4 library with the latest available version, so when a fix becomes available in the library it will make its way into iGIS. Until then, the only workaround is to transform your data into a supported coordinate system, i.e. EPSG 4326 – WGS 84, with third party software like ArcGIS, prior to iGIS import.
How can I backup and restore projects to a new phone?
UPDATE 2: This guide was updated in July 2017 to include instructions for iFunbox. The old instructions for iPhone Explorer/iExplorer may be outdated.
UPDATE: The pro version of iGIS is now able to export projects via the Data manager. At this stage, it will not export imagery layers.
If you need to restore your iPhone or iPad, or you wish to transfer your projects to a new phone, it is possible to save your projects and settings in their current state.
iGIS uses two sqlite databases in its backend; spatial-store.sqlite and Projects.sqlite. In most cases data can be restored to your iPhone after from these files using free third party software as described in the steps below.
Get a copy of these backend database files off your device using third party software like iPhone Explorer or iFunbox. The development team uses iFunbox.
Method 1: Using iFunbox
- Download and install iFunbox on your computer. The development team uses version 1.8 on Mac. At the time of writing, this version was working with all iOS devices.
- Connect your iOS device via USB to the computer you installed iFunbox on.
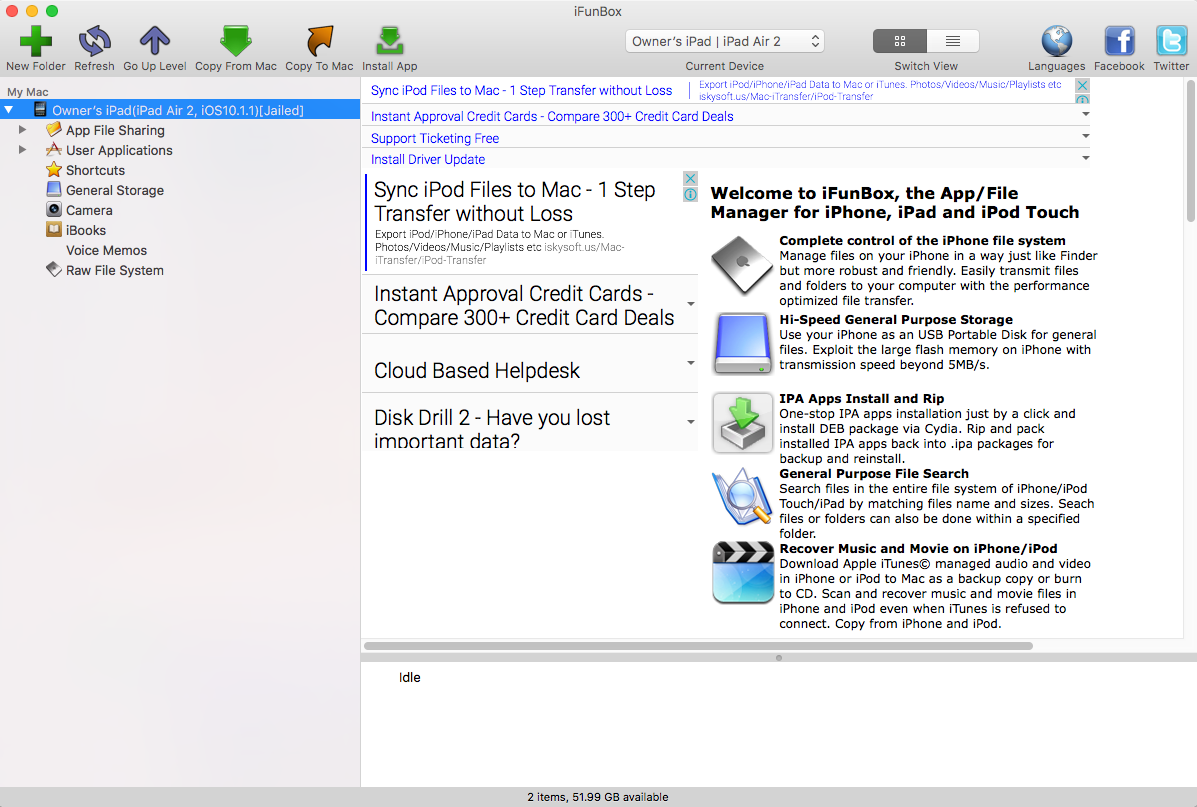
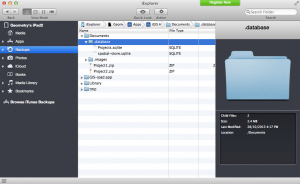
- When you launch iFunbox, you should see something like the screenshot below.
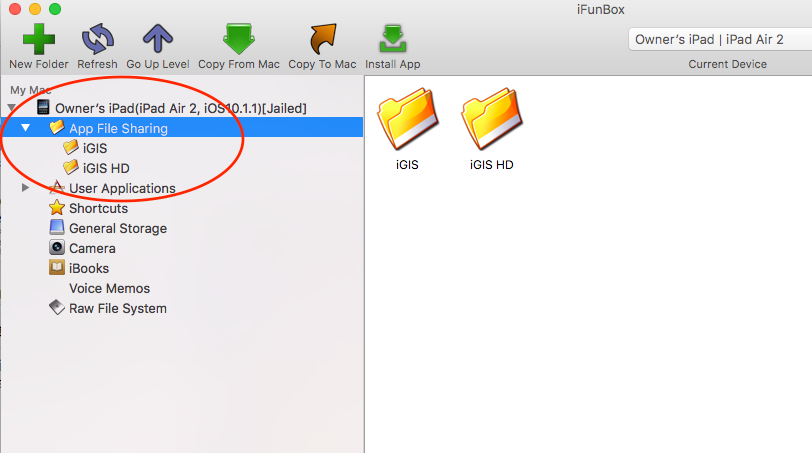
- Click on “App File Sharing” or the left arrow to expand the folder. In here, you should see folders for all the applications on your iPad that support file transfer. Go into the folder for the version of iGIS you are using (iGID HD for iPad, iGIS for iPhone).
- Inside this folder, you may see a number of blue folder icons. For the purpose of restoring projects, you need to go into the .database folder.
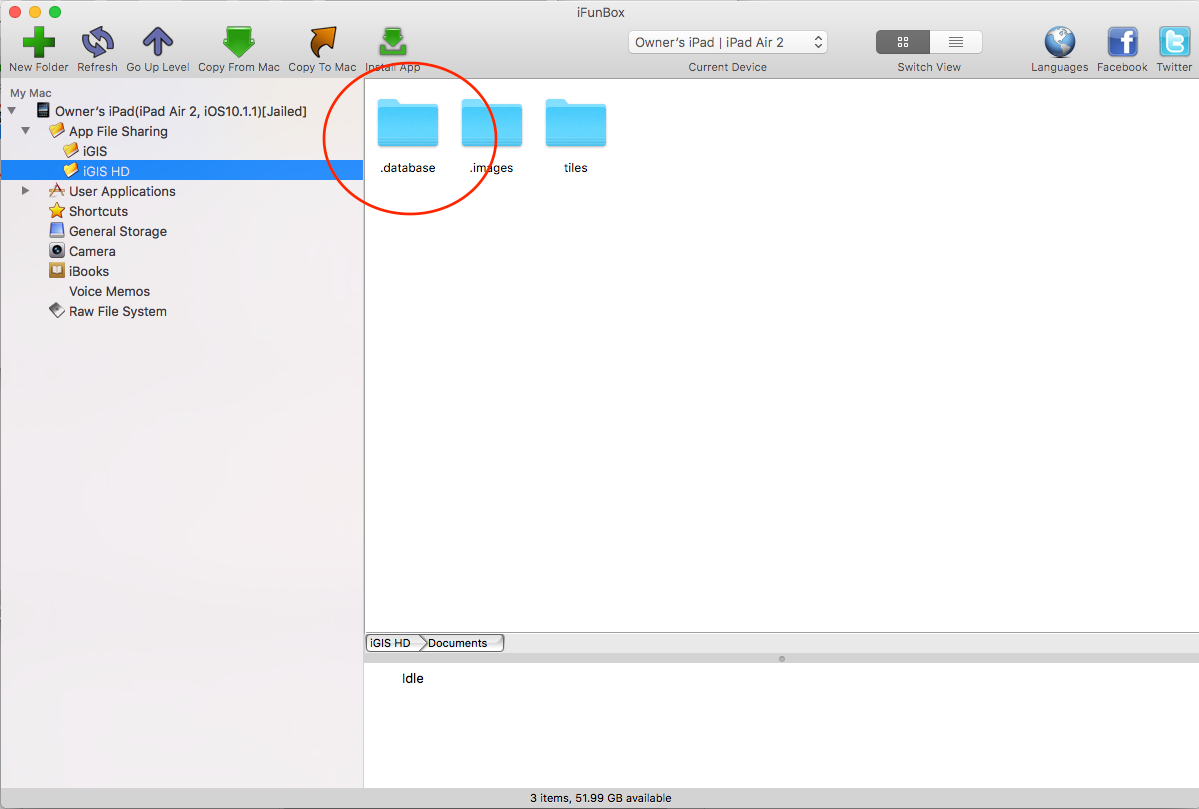
- Inside the .database folder, there will be two database files. spatial-store.sqlite stores the layer data and features. Projects.sqlite stores the information about what projects you have and what is in each project.
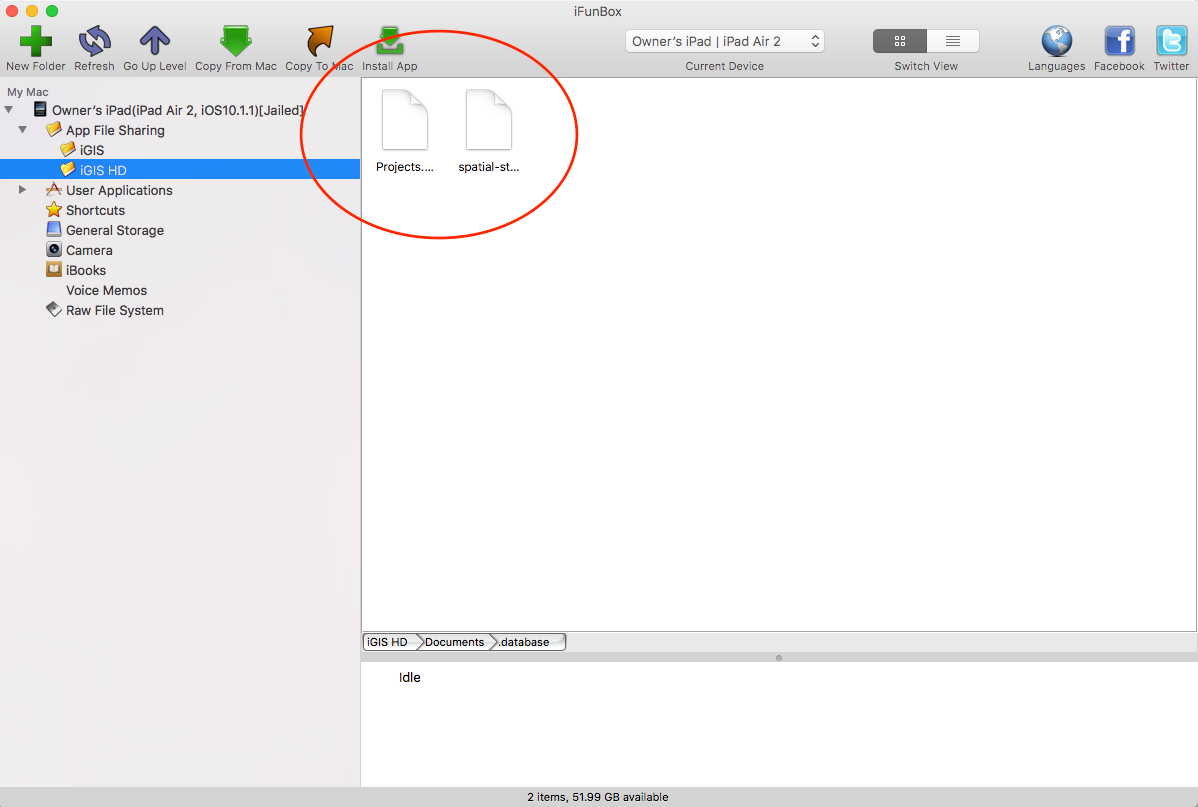
- Copy both of these files to your computer by selecting them and right clicking. You should see an option to copy these files to your Mac or PC. You can also drag and drop them from iFunbox.
- If you want to have a look at what is in these files, you can use an SQLite browser. The development team uses SQLite Manager for Firefox.
- Replace these two files if you want to restore your projects from another device. Simply copy the version of the files that you want, which overrides the old version. You can drag and drop into iFunbox to do this. Do not use iGIS at the same time you are replacing files.
When you restart iGIS, it will read the new files instead and your projects and layer data will be the replaced version.
Method 2: Using iPhone Explorer/iExplore (old guide)
- Device 1 (or, prior to restoring your device)
- Using iExplore, with your iPhone/iPad connected to your computer, navigate to: <*Your Device Name*>\Apps\iGIS\Documents\
Directory Structure
- Copy the ‘.database’ folder to your desktop.
- Note: You can simply copy the entire ‘Documents’ folder if you would prefer.
- Disconnect your device.
2. Device 2 (or, after restoring your device)
- Install iGIS and run once.
- Quit the app (iOS7: double tap the home button and flick the app window away; iOS6: double tap home button, hold iGIS icon, then remove with red button).
- Connect your device to your computer and open iExplorer. Navigate to the same folder as before: <*Your Device Name*>\Apps\iGIS\Documents\
- Overwrite the existing folder with the folder that you saved to your desktop.
- Disconnect your device and run the app.
- Your files will be available to you as before.
What field types are supported for iGIS *.glc files?
When the iGIS WiFi import page tool is used to create a *.glc file for shapefile data, each field will be described as one of the below types;
<field-type>String</field-type>
<field-type>Integer</field-type>
<field-type>Float</field-type>
<field-type>Date</field-type>
<field-type>Boolean</field-type>
iGIS also supports a number of special field types which can be used to replace these default types. When special types are defined the application will auto populate values on feature creation/edit.
<field-type>CodeList</field-type>
<field-type>Date</field-type>
<field-type>AutoIncrement</field-type>
<field-type>Status</field-type>
<field-type>GUID</field-type>
<field-type>Area</field-type>
<field-type>Length</field-type>
Is it possible to recover my data from iGIS if the export process fails for a given layer? (For advanced users)
iGIS uses two sqlite databases in its backend; spatial-store.sqlite and Projects.sqlite. In most cases data can be recovered to shapefile from these files using free third party software as described in the steps below.
UPDATE: The development team uses iFunbox to retrieve the database files. For a guide of how to use it, please refer to this guide on backing up and restoring projects.
1. Get a copy of these backend database files off your device using third party software like; iPhone Explorer http://www.macroplant.com/iexplorer/
-Once installed, use iExplorer in its free demo mode to navigate to;
iphone iExplorer\<*Your Device Name*>\Apps\iGIS\Documents\.databaseipad iExplorer\<*Your Device Name*>\Apps\iGIS HD\Documents\.database
Save the spatialstore.sqlite and Projects.sqlite files to a location on your PC.
2. The spatial data in the spatial-store.sqlite database can be visualised and exported to shapefiles using the open source software Spatialite-GIS. This software can be found at the below linked site;
http://www.gaia-gis.it/spatialite-2.3.1/binaries.html
For a Windows 7 PC, downloaded and install; spatialite-gis-win-x86-1.0-ALPHA-1.zip
How is the filter parameter applied to a layer?
iGIS stores all its vector data in a SQLite database on the iOS device. A layers defined filter text is applied at the SQLite database level as the WHERE clause component of a SQL SELECT query.
i.e. a defined filter parameter of:
Unit_type IN (‘GP’,’SP’) AND source = ‘GCCT’
would be applied to the target layer as;
SELECT * FROM <target layer> WHERE Unit_type IN (‘GP’,’SP’) AND source = ‘GCCT’;
Filter text clauses just need to be SQLite SQL compliant. http://www.sqlite.org/
Capturing photos and linking them to features
UPDATE: Photos is no longer in beta. Pro subscription is required.
From version 6.0 photos can be captured and linked to features. This is a ‘Pro feature’ provided as BETA functionality in version 6.0, please note that future versions will require Pro features to be activated via an in-app purchase.
To link photos to features you will first need to define an ‘ID field’ for the target layer. To do this Open the target Projects settings, and navigate to the target layers settings.
‘ID field’ attributes are used in the naming of the photos to enable easy linking or GIS software hyperlink creation after export from iGIS.
Photos can be captured and linked to existing or newly created features:
– To add photos to an existing feature, single tap the feature in the map window to display its attributes. Select Edit, Scroll down to the end of the attribute list and select Photos.
– To add photos at the time of feature creation, In edit mode, after the features geometry has been defined, select commit to bring up the attribute window, Scroll down to the end of the attribute list and select Photos.
On USB export from iGIS linked images are exported to a directory beside your exported shapefile data.
The naming conventions for images captured in iGIS are;
<shapefile name>-<iGIS ID Field value>-<Image number for feature>.jpg
i.e.
aus10bgd_r-12-1.jpg
The process of setting up hyperlinks to these images is different depending on which GIS software you use.
The below linked ESRI article describes how to setup dynamic and field based hyperlinks in ArcGIS.
File size limitation for iGIS USB import
UPDATE: the zipping manager iGIS uses has changed. The file limit in this article may have changed.
During the iGIS USB import process the zipped data is sent to the apple device and is then extracted. The import may fail on large files if the extraction process runs out of available resources on the device.
We have found the limit to be around a 1.5GB zip file for iGIS v5.1.3 running on the iPhone5 and the iPad with retina display. This limit is not an exact filesize as it is imposed by consumption of available device resuorces, which can be variable.
Empty template shapefiles for creating new point, line and polygon features.
UPDATE: You do not need existing shapefiles to create layers. iGIS can create empty layers for you via the Settings of a project.
Before you can create and edit features in iGIS you need some layers to store your data in. Layers are created by importing existing shapefiles which have been created in third party software into iGIS. If you do not have any shapefiles, you can download the below attached zip file which contains a template point, line and polygon shapefile. The attached shapefiles should be imported into iGIS using the import settings;
Projection System: [EPSG: 4326] WGS 84 (Lat/Lon)
Characterset: UTF-8
Rendering a layer with feature specific colours
UPDATE: The next update (as of 24-6-16) will have an option to render the labels of features with specific colours. The process is identical to what is described here.
As the shapefile format does not store feature rendering details within it’s shape attribute, iGIS supports feature specific colour rendering via the definition of hexadecimal colour code values within an attribute of the shapefile.
To use this functionality your shapefile will need a ‘Text’ type field containing hexadecimal colour code values.
The below screen print from ArcMap shows a display colour attribute field called ‘disp_col’ containing hexadecimal colour code values per feature.

A shapeifle like the one seen in the image above could then be imported into iGIS, and added to a project with its ‘color attribute’ option for the layer set to the ‘disp_col’ attribute.
When the project is opened features for the layer will be rendered with their defined colour.
There are many hexadecimal colour code charts and tools available online.
Is the iGIS in-App help documentation available in pdf format?
UPDATE: This document is outdated. The in-app help will be updated with new features in the next update (as of 24-6-16).
Yes, please see the below linked pdf document.